pfun-cma-model
Quickstart
This guide walks you through the most common workflows in under 5 minutes.
1. Run the CMA model
The simplest way to generate a CMA decomposition:
from pfun_cma_model import CMASleepWakeModel

# Create a model with default parameters
cma = CMASleepWakeModel(N=288)  # 288 points = 5-min resolution

# Run the model and get results as a DataFrame
df = cma.run()
print(df.head())
Output columns include: t (time), c (cortisol), m (melatonin), a (adiponectin), I_S (insulin sensitivity), I_E (insulin effect), L (light), and per-meal glucose components g_0, g_1, g_2, plus total glucose G.
2. Fit the model to data
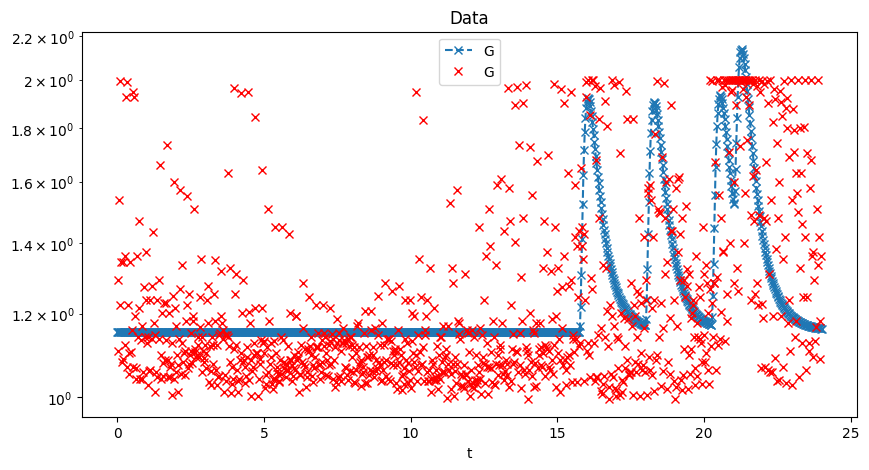
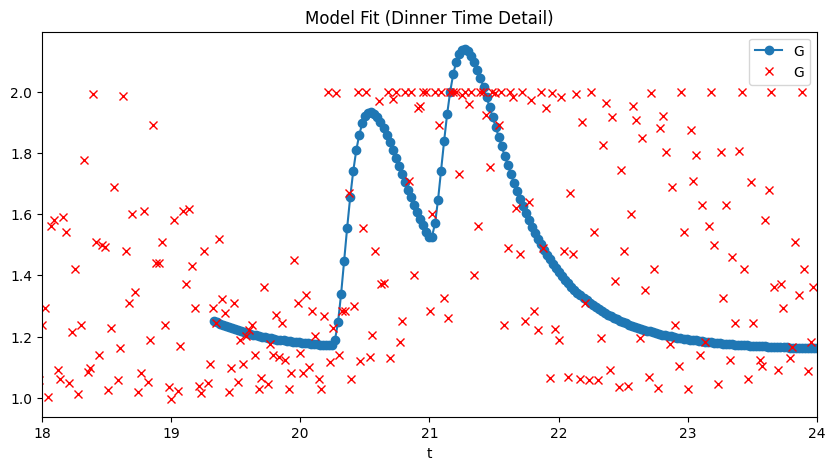
Fit the CMA model to CGM (continuous glucose monitor) data:
import pandas as pd
from pfun_cma_model import fit_model

# Load your CGM data (must have columns: 't' and 'G')
data = pd.read_csv("your_cgm_data.csv")

# Fit the model
result = fit_model(data, N=1024, plot=False)

# Inspect the optimized parameters
print(result.popt_named)
# {'d': -0.21, 'taup': 4.67, 'taug': 1.10, 'B': 0.13, 'Cm': 0.00, 'toff': 0.00}
3. Fit model via CLI
# Download sample data, fit, and plot
uv run pfun-cma-model download-sample-data
uv run pfun-cma-model fit-model --plot
The fitted parameters and solution are saved to results/fit_result.json.
4. Generate an LLM scenario
Use natural language to generate physiologically valid parameter sets:
uv run pfun-cma-model generate-scenario \
  --query "a healthy individual with a tendency to sleep in"
{
    "qualitative_description": "This individual is a healthy young adult
      who is a natural 'night owl'...",
    "parameters": {
        "toff": 2.5,
        "d": 0,
        "taup": 1,
        "taug": 1,
        "B": 0.05,
        "Cm": 0
    }
}
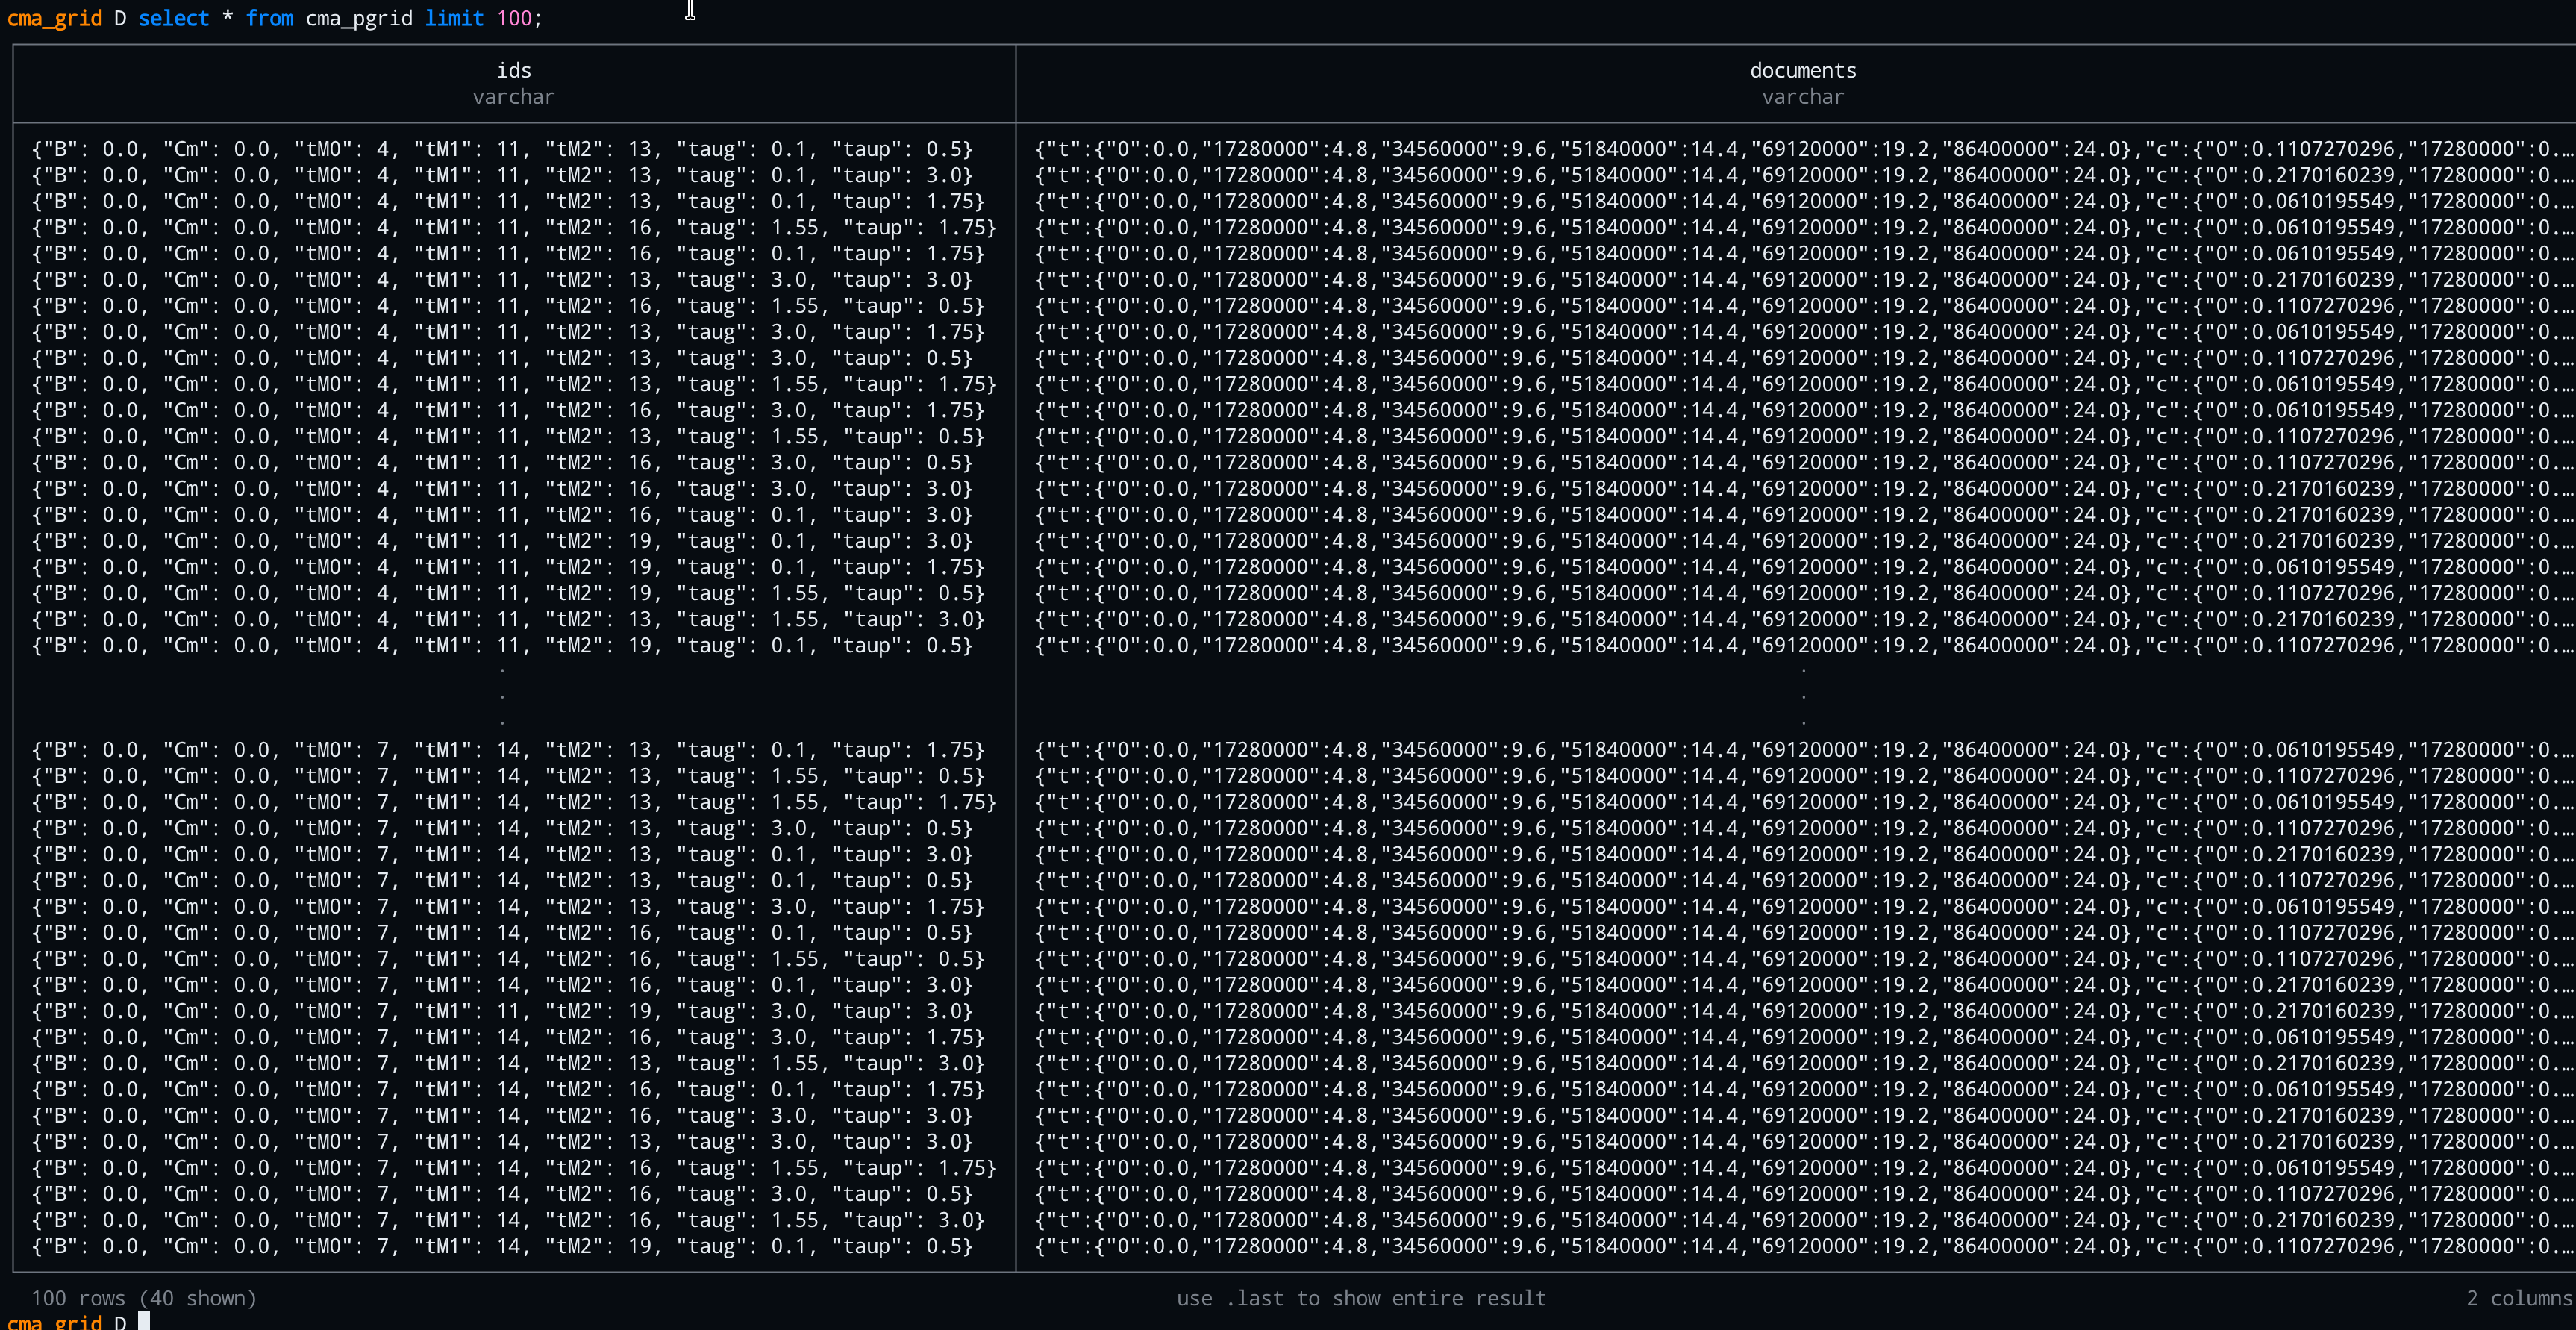
5. Run the parameter grid search
Explore the parameter space systematically:
# Run a 6×3 parameter grid
uv run pfun-cma-model run-param-grid -N 6 -m 3

# Results saved as Parquet and into DuckDB
6. Start the web application
# Development server with auto-reload
uv run fastapi dev pfun_cma_model/app.py --port 8001

# — or via the CLI —
uv run pfun-cma-model launch --port 8001 --reload
Then open:
- Swagger UI: http://localhost:8001/docs
- ReDoc: http://localhost:8001/redoc
- LLM Demo: http://localhost:8001/demo/llm
- WebSocket Demo: http://localhost:8001/demo/run-at-time
7. Launch the Qt desktop GUI
# Requires the qt6 dependency group
uv sync --group qt6

# Launch
./scripts/launch-qt-gui.sh
The Qt GUI provides a native desktop interface with:
- Server health checks with auto-reconnect
- LLM scenario generation with auto-retry on failures
- Responsive, DPI-aware design
→ Next: CMA Model Overview